Even the best shots sometimes need a little post-processing love to fix wonky horizons or chop out distracting elements. Don't fret! With Photoshop's tools, straightening crooked shots and trimming away unwanted bits is a cinch.
In this article, we'll walk through all the techniques you need to perfect your images, from simple crops to advanced transformations.
Let's get editing!
Cropping
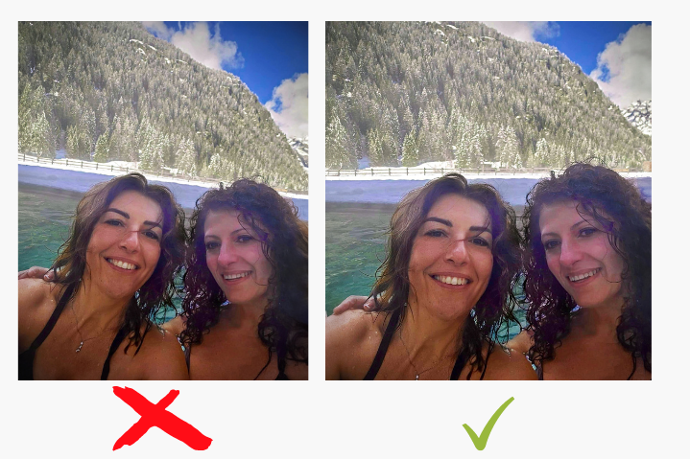
Cropping allows you to cut out parts of your photo you don't want. To crop, select the Crop Tool from the toolbar. Drag the corners of the box that appears over your photo to select the area you want to keep. Hit Enter or double click inside the box to crop.

Play around with different crop sizes to see what you like best!
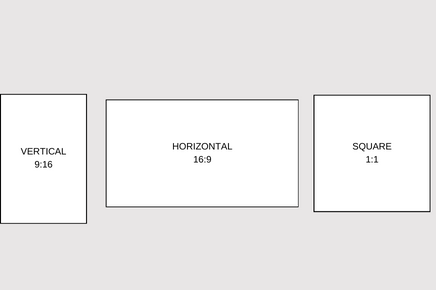
Pay attention to the client request!
- Vertical (9:16): perfect for portraits, city scenes, or product shots.
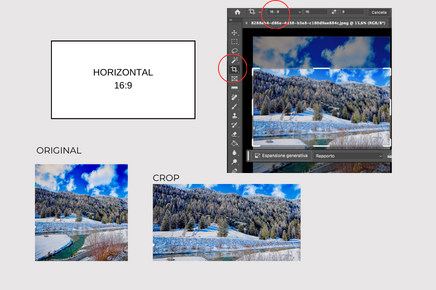
- Orizontal (16:9): it's perfect for landscapes, city scenes, and group shots.
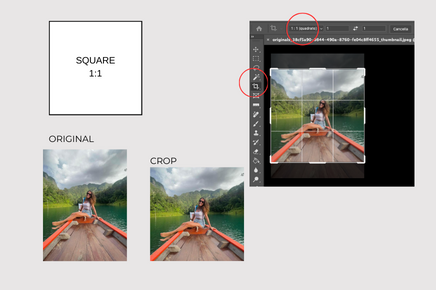
- Square (1:1): for product shots, food photography or flat lays, a square crop is a stylish way to showcase details and highlight the subject's form and geometry.
The Perspective Crop Tool
For photos with extreme angles or perspectives, the Perspective Crop Tool is a lifesaver. It lets you transform and warp the crop box so you can crop out distracting elements, then straighten vertical and horizontal lines.
Using the tool is similar to the Crop Tool but you have additional options to adjust the perspective. Give it a try on photos with strong angles and see how it can take your cropping skills to the next level!

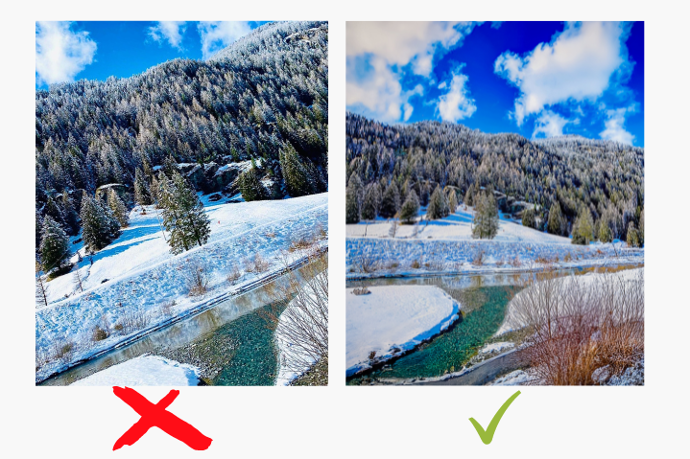
Straightening the horizon.
If the photo has a crooked horizon line or isn't quite level, the Straighten Tool can fix that. Select the tool and draw a line along the horizon in your photo. Photoshop will automatically straighten the photo for you.
Adjust the line and double check the preview to make sure it looks right.

If your photo looks a bit wonky, use the protractor icon located at the top of the crop box to rotate the image in increments of 0.1 degrees. Line up elements like the horizon or buildings to make the image perfectly straight.

With the techniques you've learned, you can now tidy up any wonky shots and get perfect compositions every time.

So get creative, have fun, and make your photos shine.
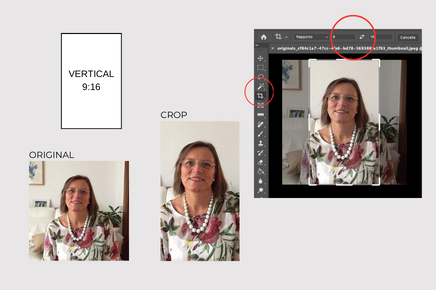
Attention:
In our Pro Service there is the possibility to select a specific crop:

It's very important apply all the request received from the client!
Enjoy reading and have a good photo editing!
Do not worry if you forget something,
here you can find all the manuals
Cropping and Straightening