The colors don't quite match or the skin tones look too warm. Don't stress! With a few simple Photoshop color correction techniques, you can get your images looking polished and professional in no time.
You'll be amazed at how a few small changes can take your photos from good to great!
The colour matching can be helpful with Pro and Magic service.
What Is Colour Correction?
Color correction in Photoshop refers to adjusting the color balance, saturation, and tones in your images to make them more vibrant and true to life.
Step by step
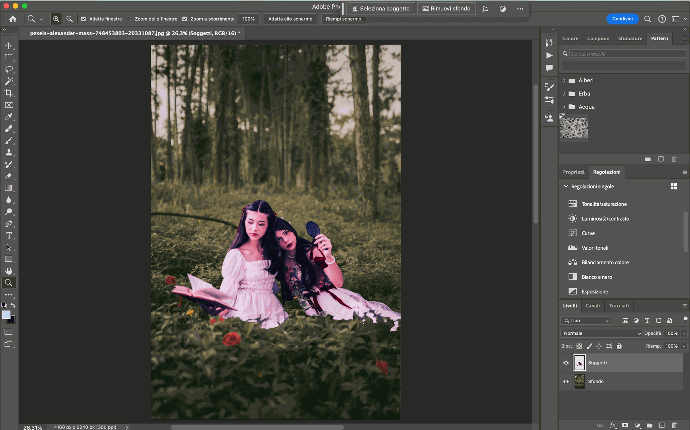
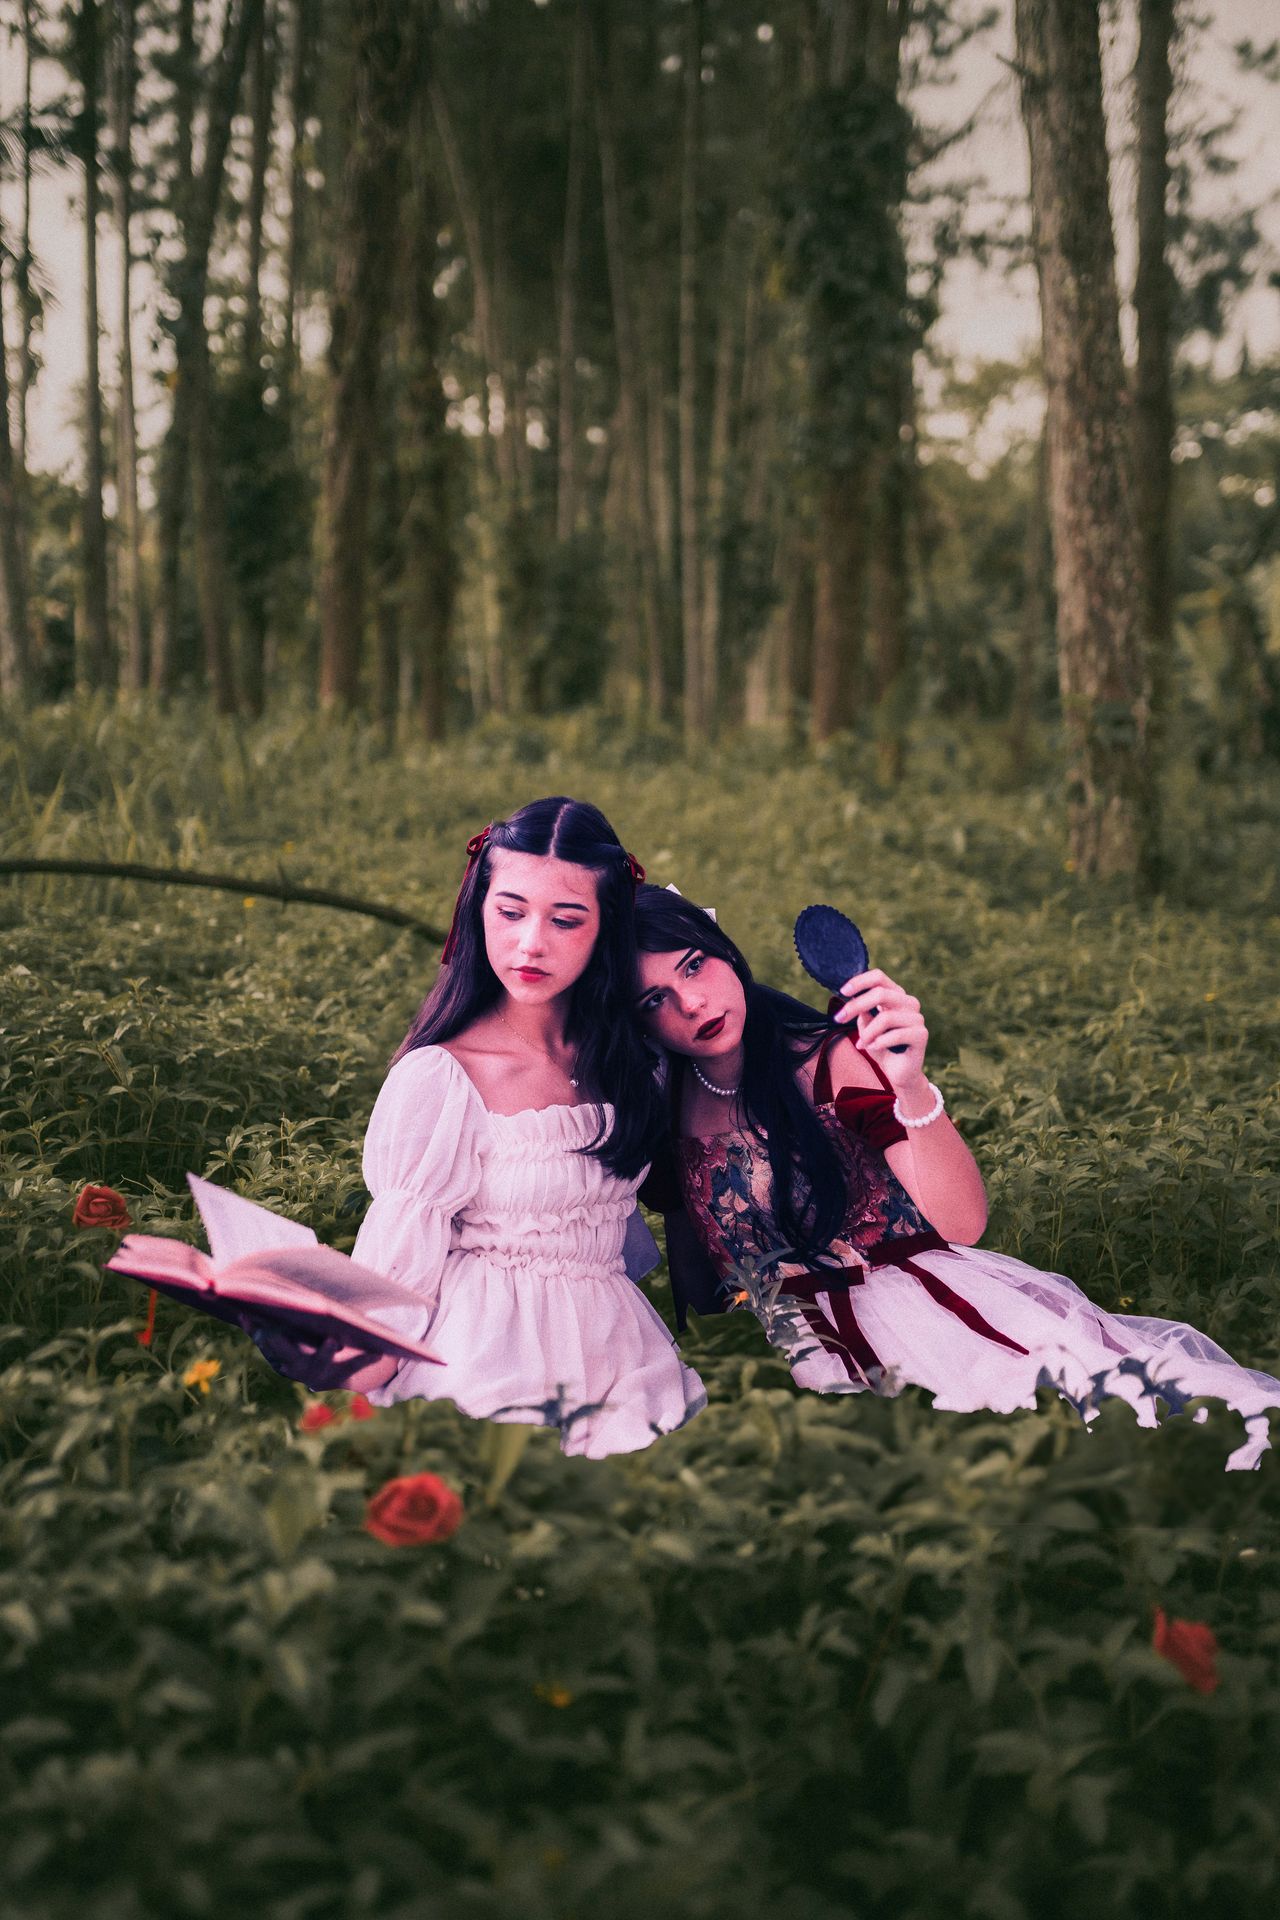
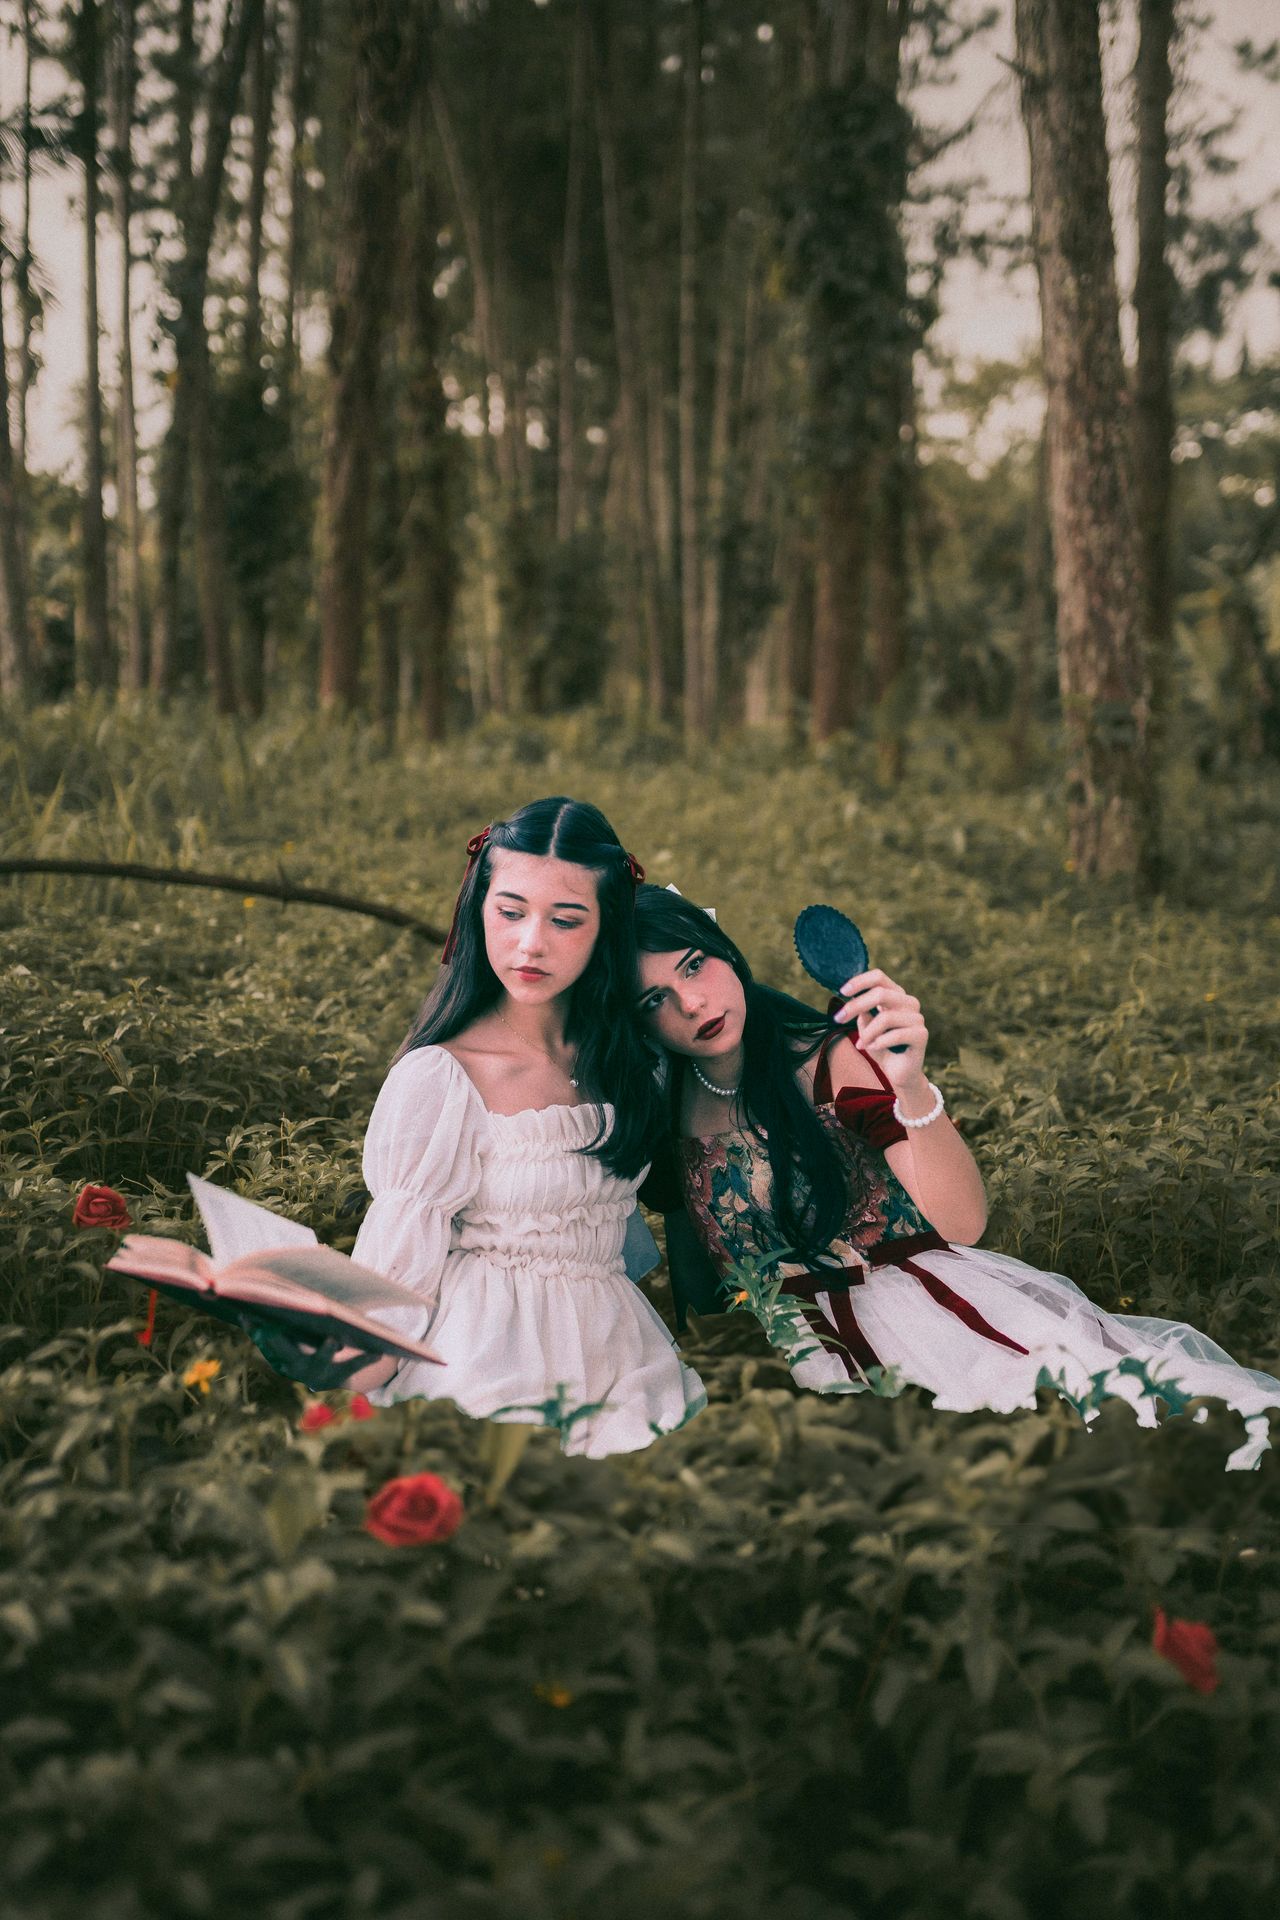
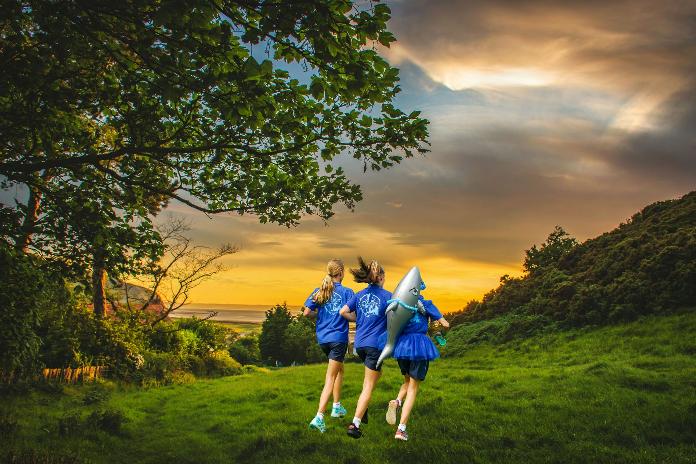
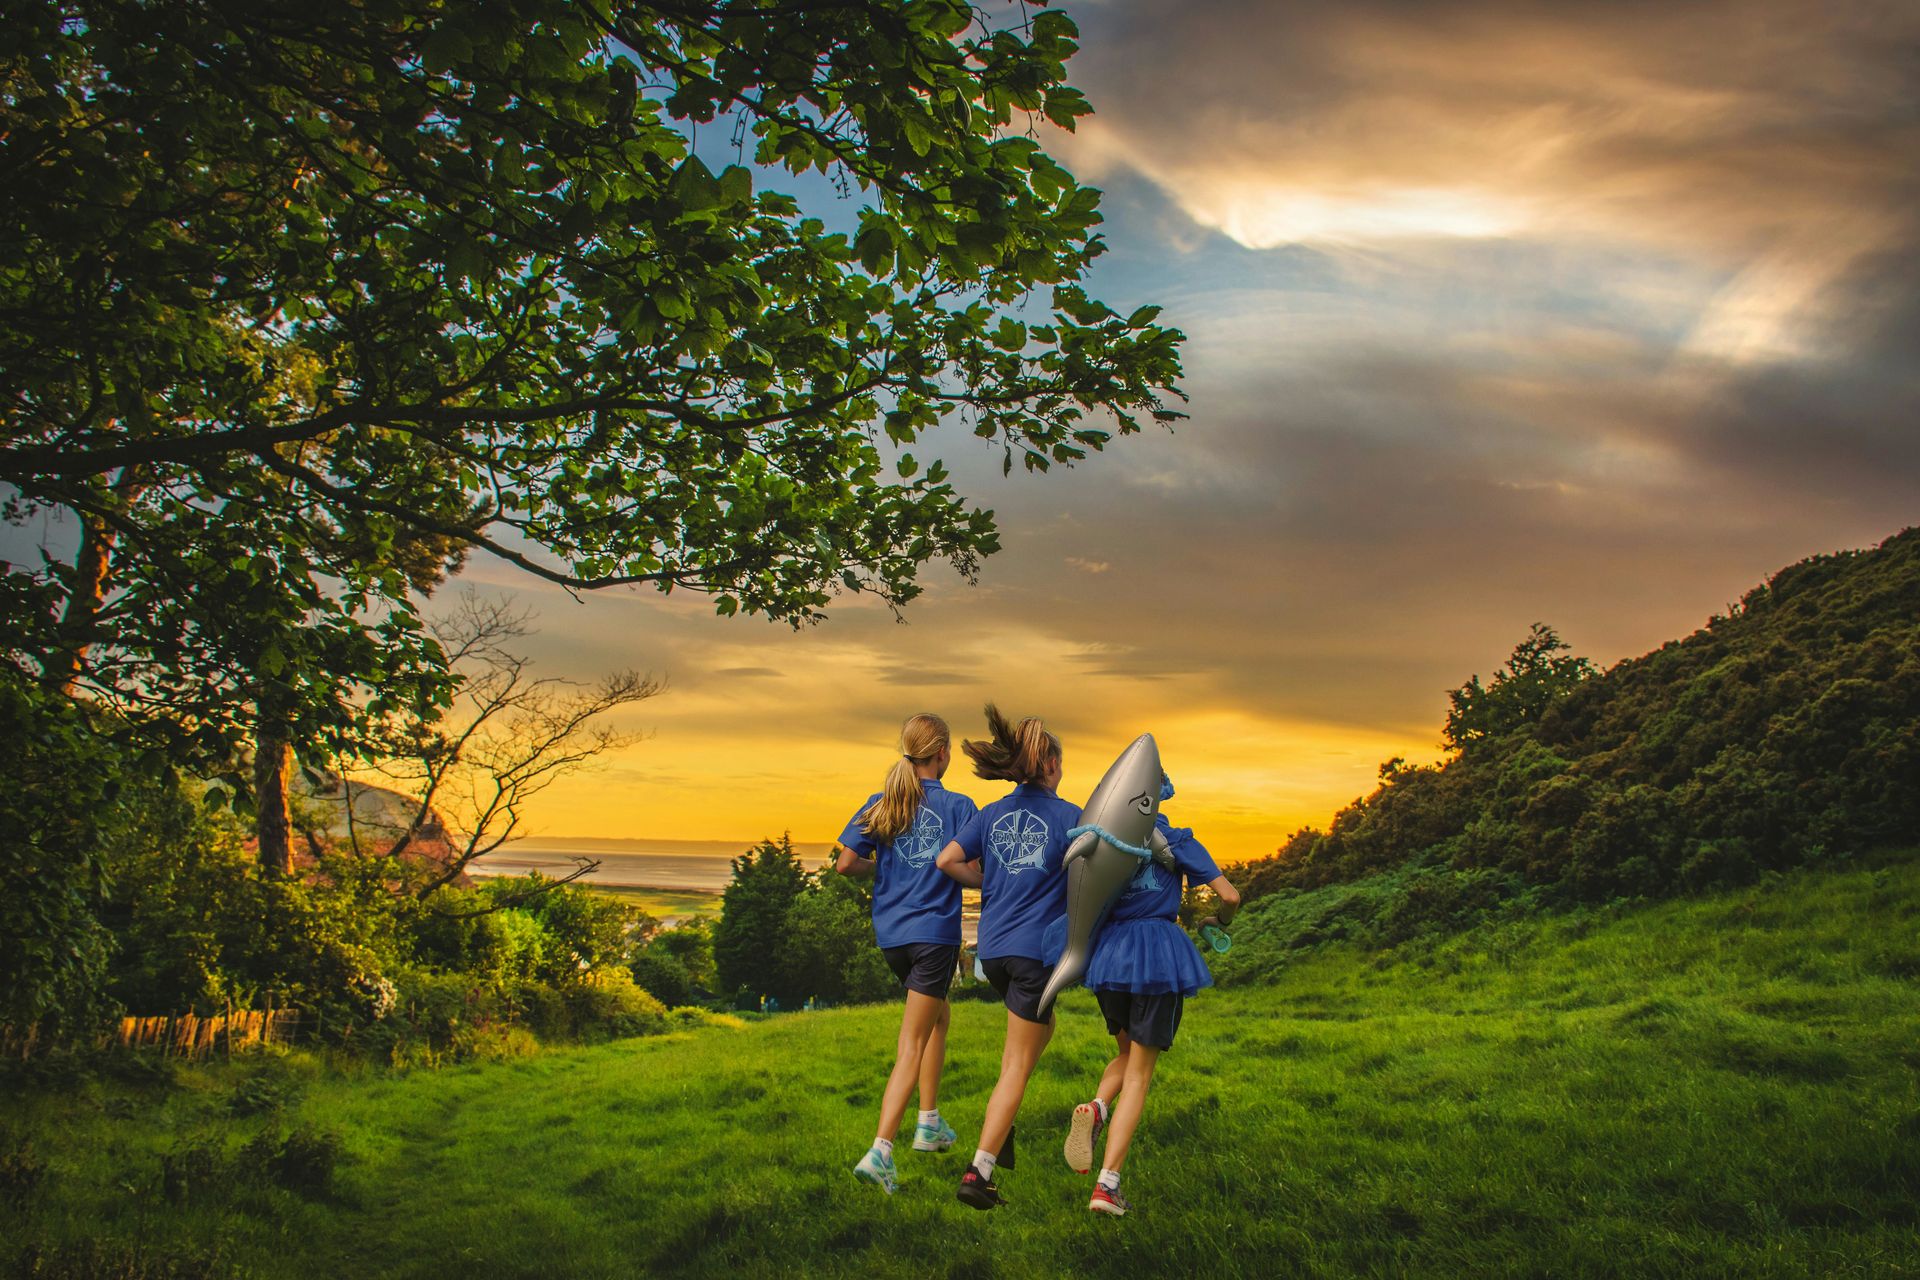
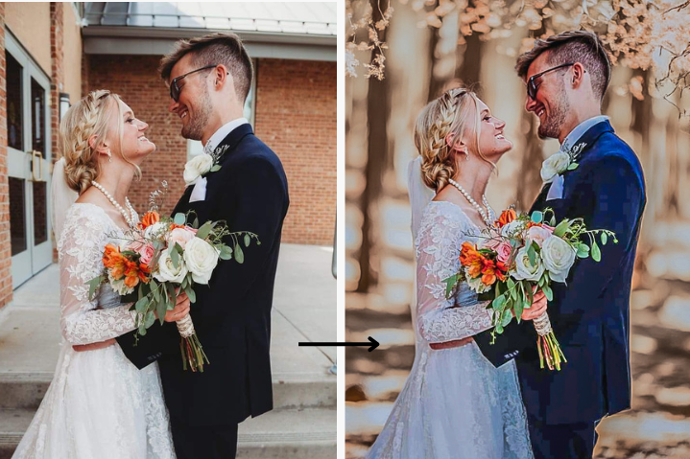
Starting from the base, after opening our images - the background and the subkject -. We choose first of all the adjustng the colour balance, and then we open the option. With small touches, try to matching the athmosphere of the photos.
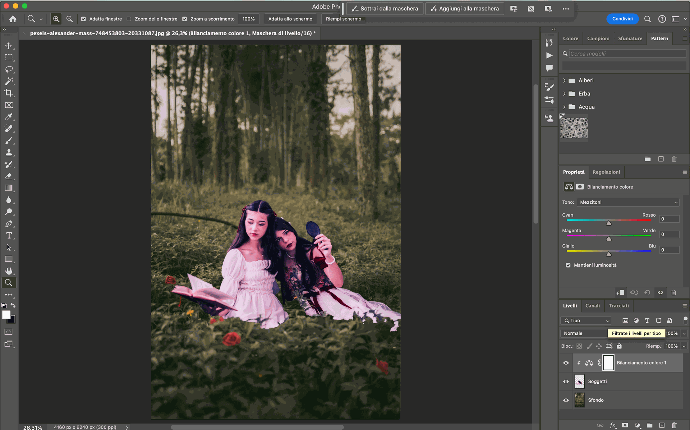
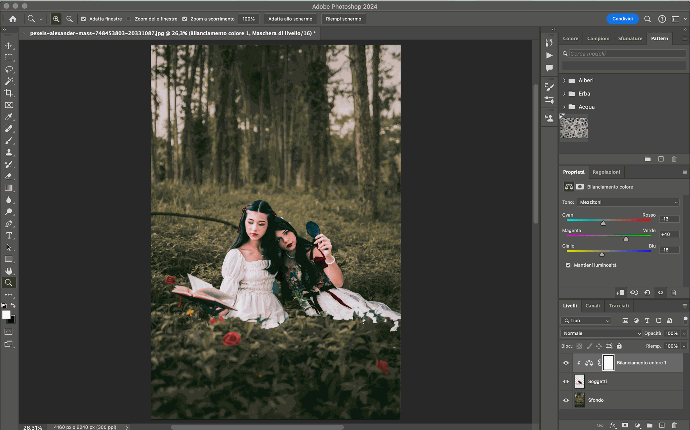
- Adjust the White Balance: If your photo has an overall color cast, the white balance is probably off. Use the Color Balance tool to shift the highlights and midtones toward warmer or cooler tones.
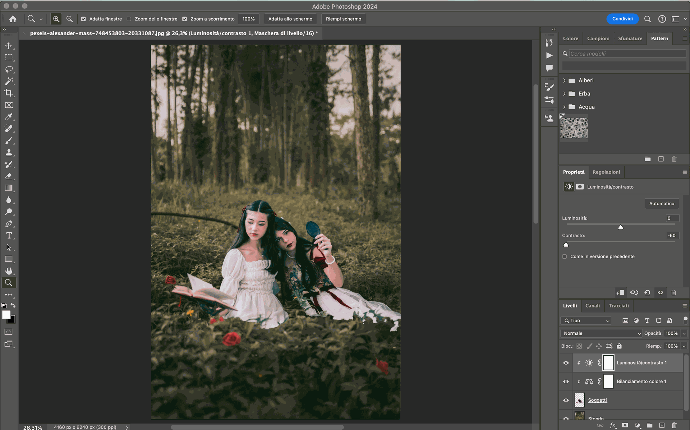
- Correcting saturation: check how saturated or vibrant the colors are. For overly saturated colors, decrease the saturation. For dull colors, increase it. You can adjust the saturation for the entire image or select specific colors to modify.
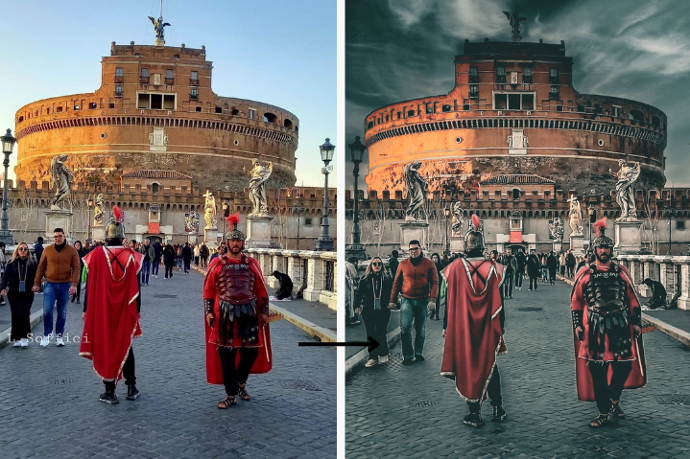
In some photos, you may will need to use a different technique to match the colours: the Neural Filter:

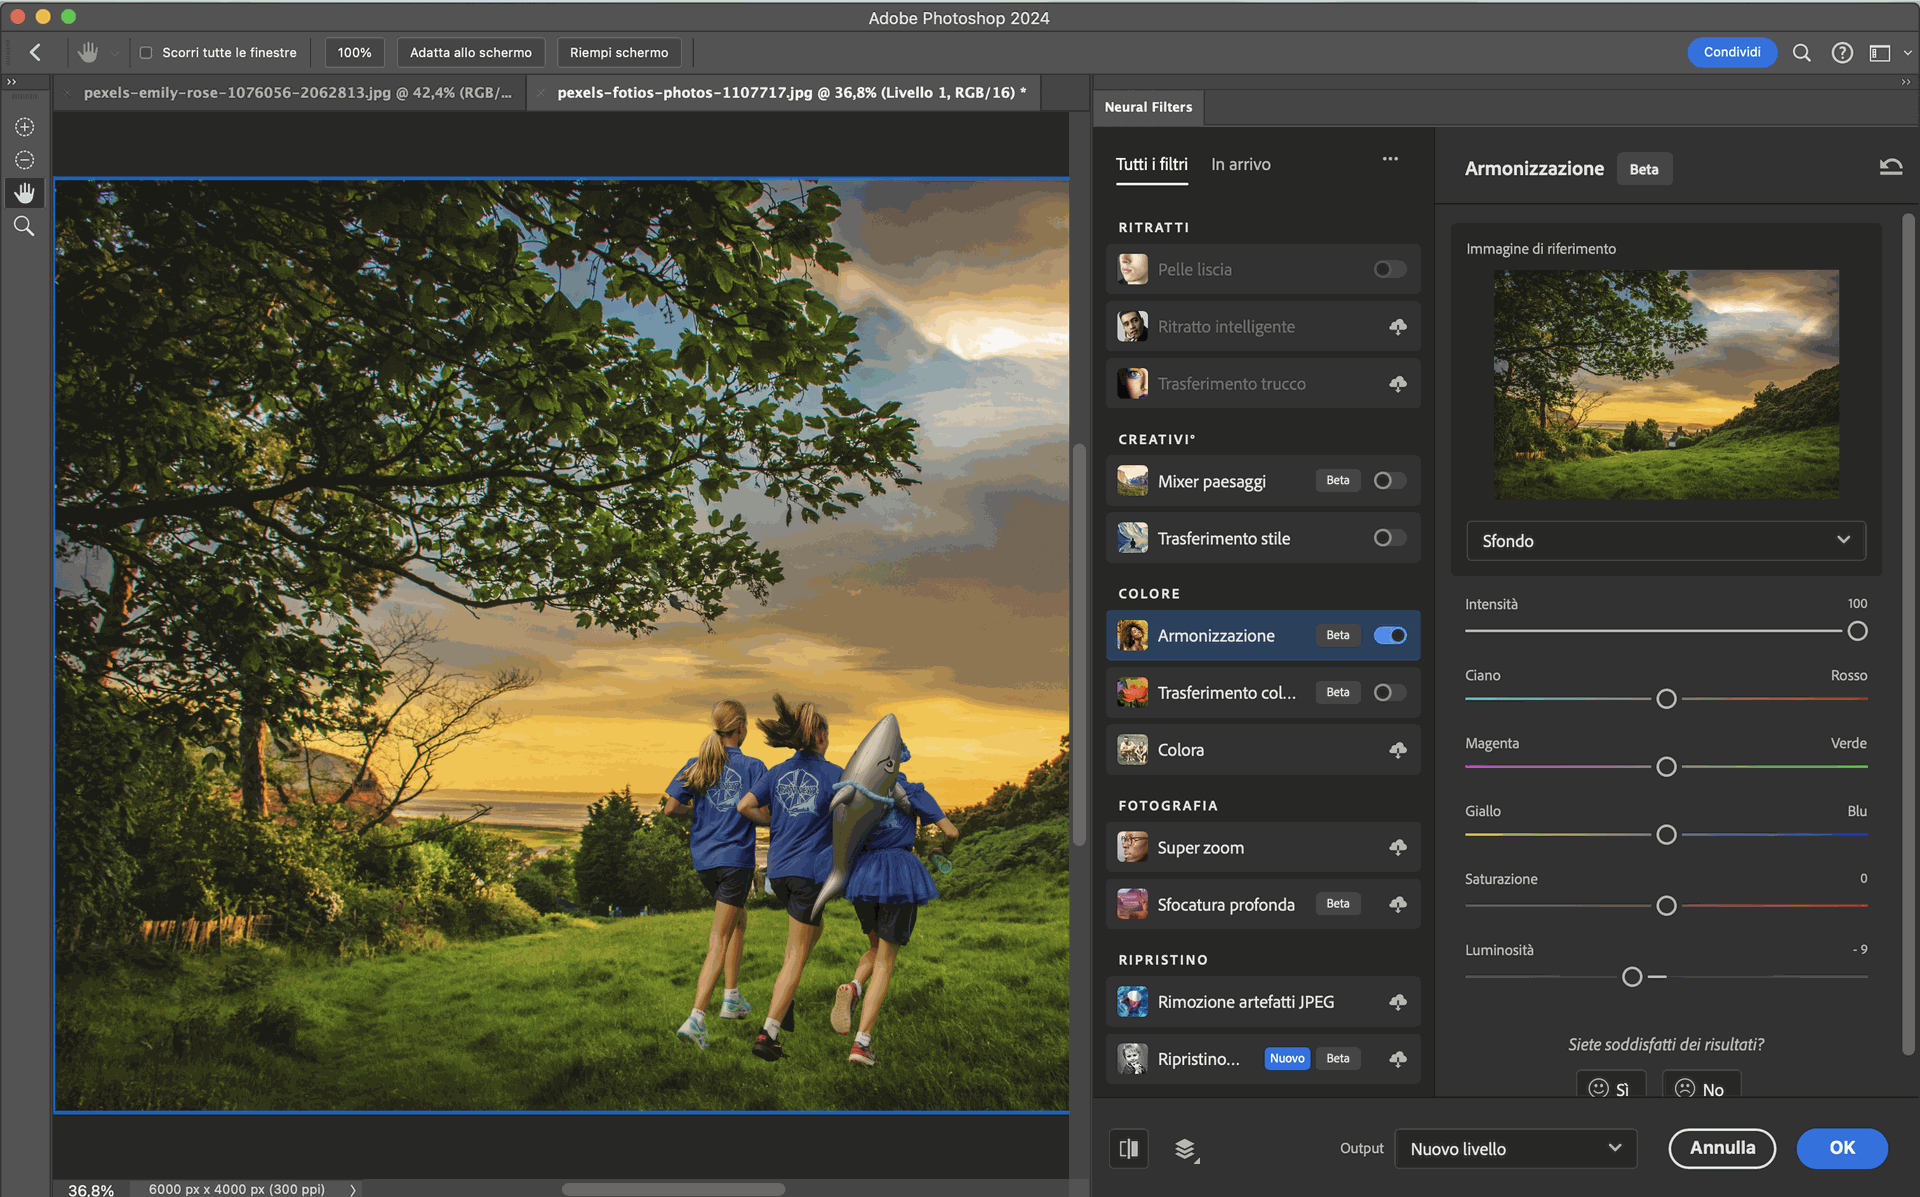
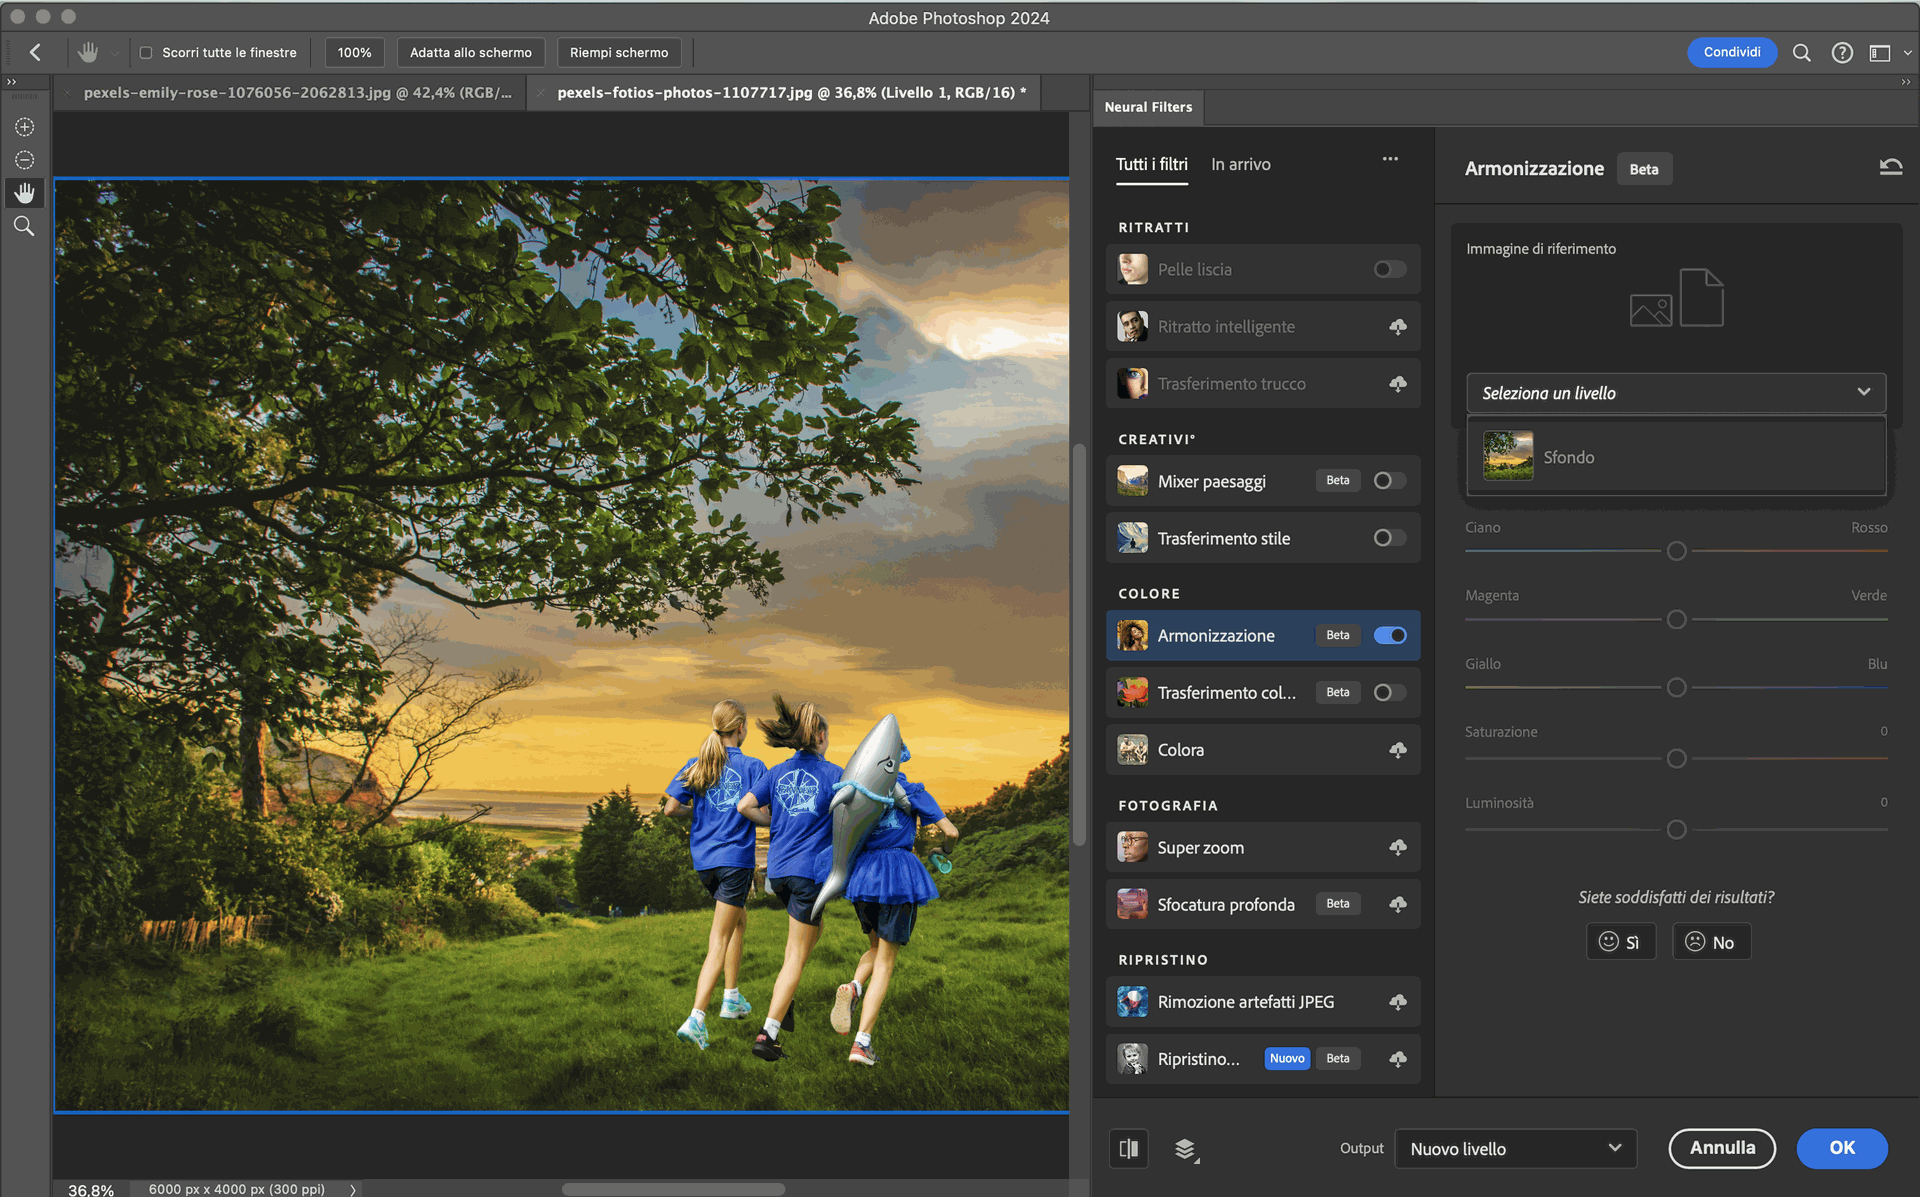
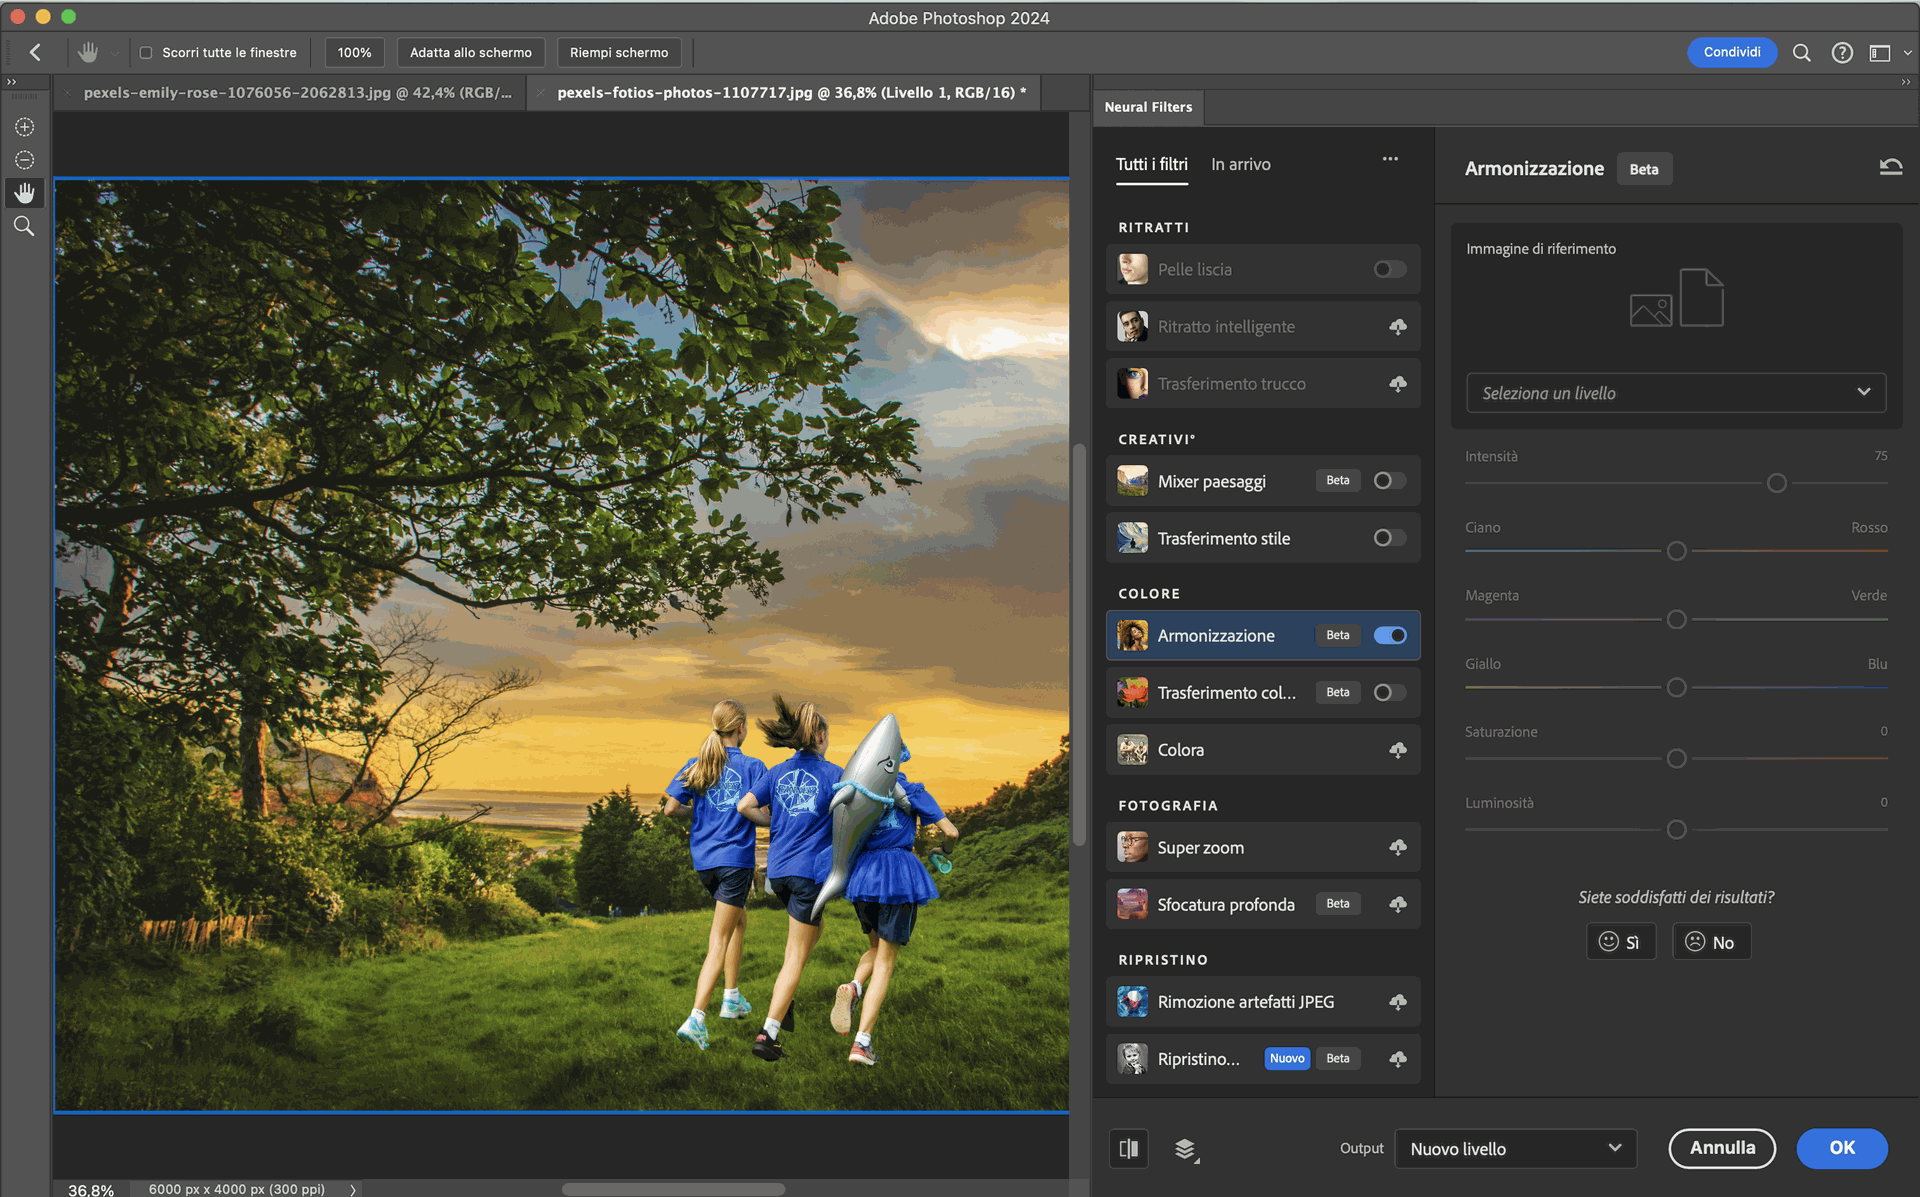
Select the Neural Filter, and through the harmonization, we activate the modifier. We select the level and in this way decide from which image to extract the colors. After this, we choose the background level and proceed with processing the work. At this point, it will be necessary to adjust the values in order to create a better effect.
So get creative, have fun, and make your photos shine.

Enjoy reading and have a good photo editing!
Do not worry if you forget something,
here you can find all the manuals
Matching the colours