The lighting's not quite right, the angles are awkward, and the space feels cluttered: don't stress - with a few clever Photoshop tricks, you can edit those interiors into magazine-worthy shots.
In this post, we'll walk through simple techniques to touch up lighting, straighten lines and walls, cut out clutter, to enhance the photos for the new features of Pro Service!
Let's get started!
The Basics
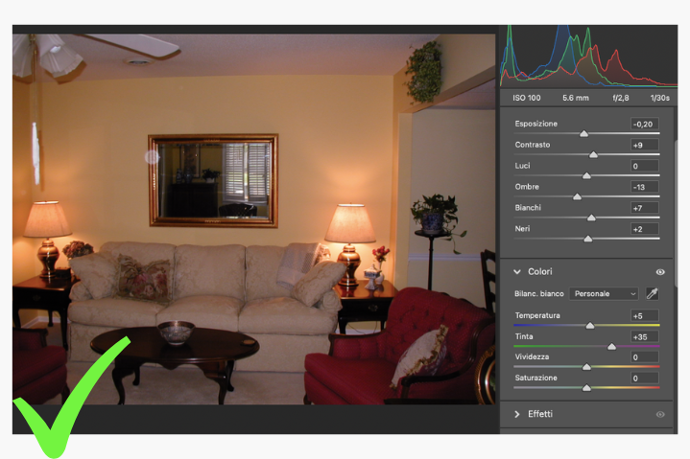
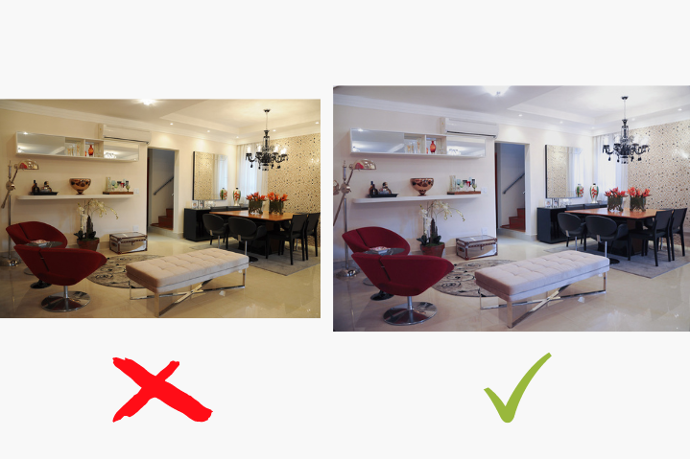
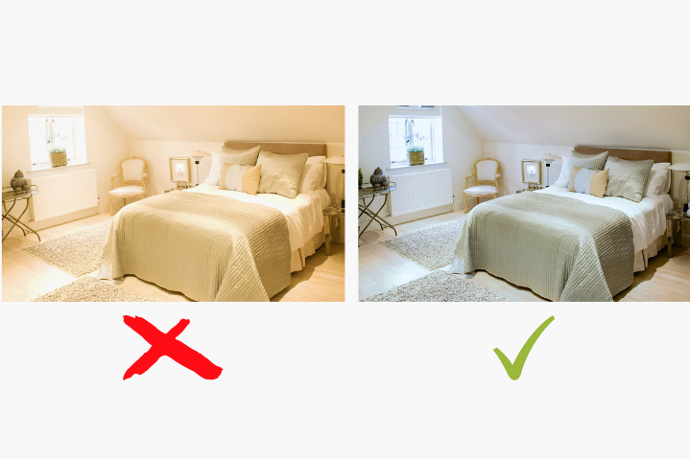
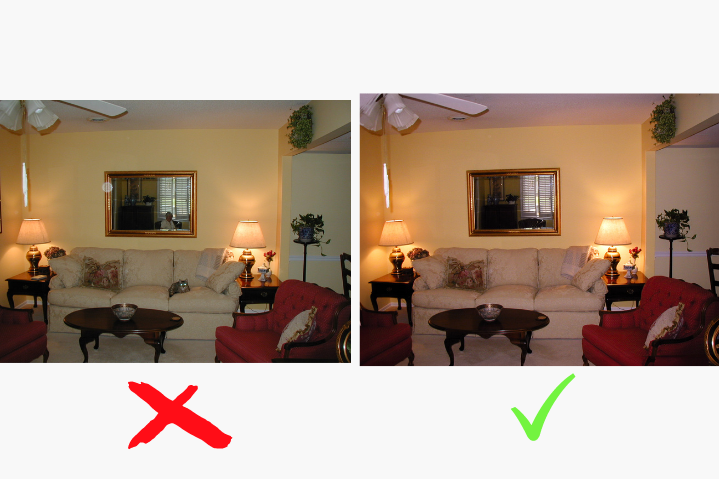
- Adjusting Exposure: for under or overexposed shots, use the Exposure slider. Drag it left to darken a too-bright image or right to lighten a too-dark photo. Check the histogram to ensure details are not lost in the shadows or highlights.
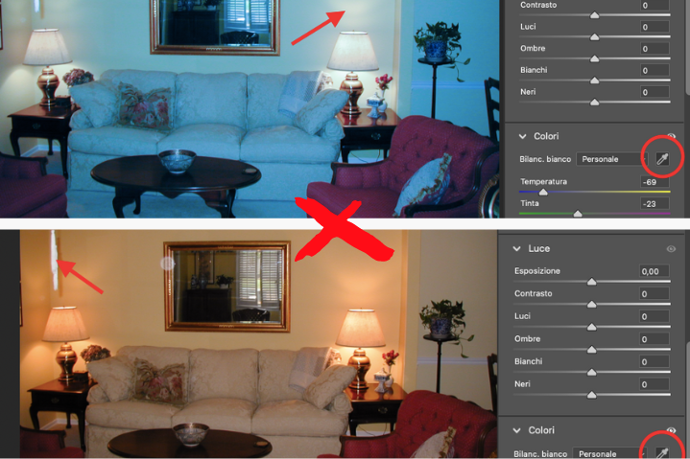
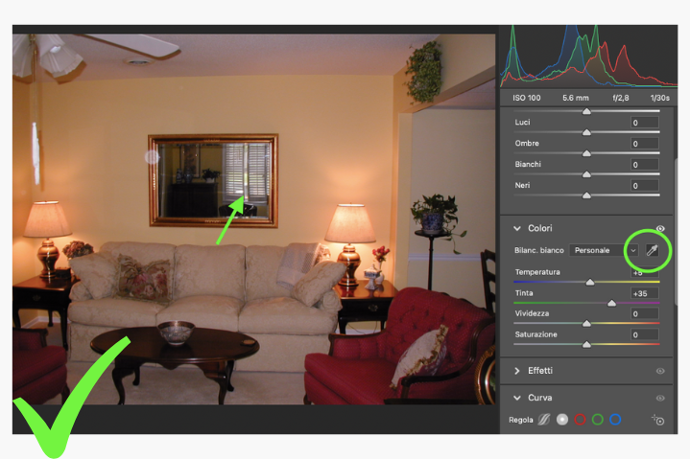
- White Balance: select it and click on an area that should be white or neutral gray. Photoshop will adjust the temperature and tint sliders to remove any color cast. Zeroing in on the white balance and exposure ensures your photo looks as natural as the actual room. You want the colors and lighting to seem realistic before you dive into more stylized edits.
Perspective and Distortion
Photographing interiors often means dealing with perspective distortion from using wide angle lenses. With a few adjustments in Photoshop, you can correct these distortions and make your interior shots look professionally polished.
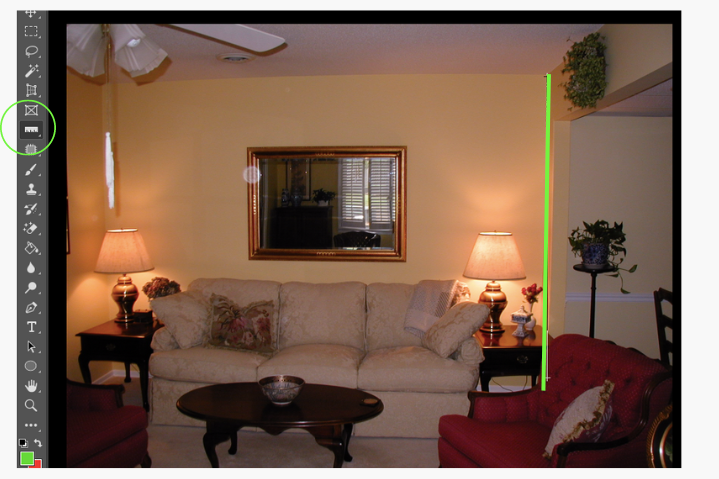
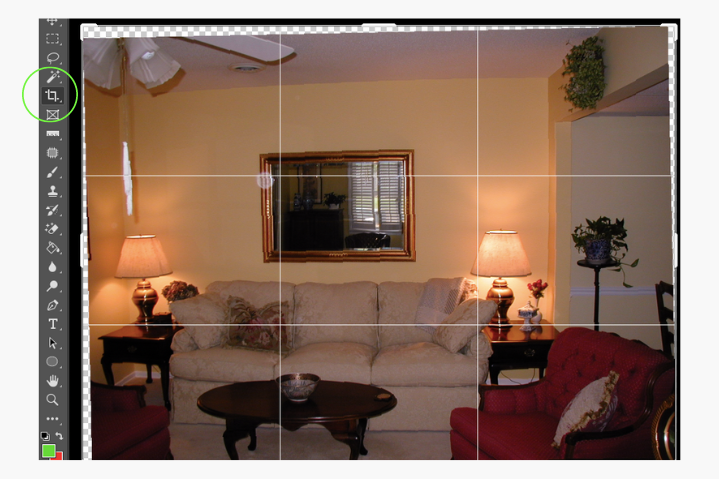
- Adjusting the Verticals: use the “Vertical Perspective Correction” filter to straighten them out. Select the “Show Grid” view to see the vertical and horizontal lines in your photo. Then adjust the “Vertical Perspective” slider until the vertical lines appear perfectly straight. This will make a dramatic difference in the feel of your interior space.
- Adjusting the Horizon: An off-kilter horizon can make a space seem unbalanced and disorienting. Select the “Ruler Tool” and draw a line that follows the natural horizon of your interior.
Removing Clutter
Use the Clone Stamp Tool to get rid of any clutter or distracting elements in your photo. Things like light switches, thermostats, trim, vents, outlets or any other visual clutter should be removed.
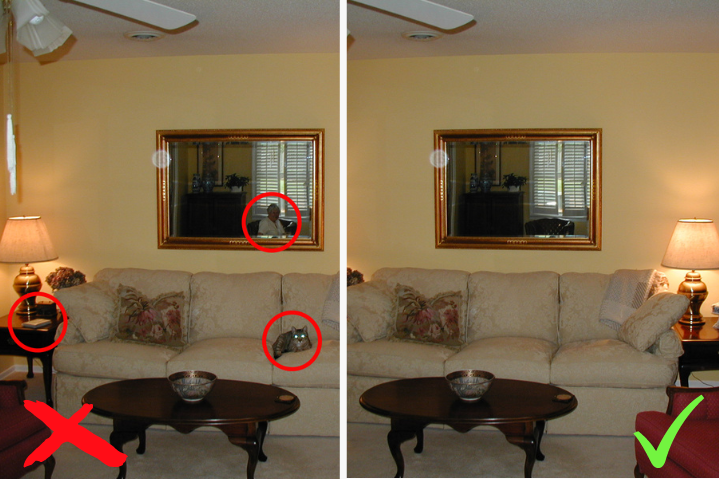
Use the Spot Healing Brush Tool to clean up any marks, stains, scratches or imperfections on walls and floors.

So get creative, have fun, and make your photos shine.
Enjoy reading and have a good photo editing!
Do not worry if you forget something,
here you can find all the manuals
Photoshop For Interiors